
When people hear the word implant, the same things usually come to mind: an incision, stitches, pain, swelling and a long recovery. In this article I walk you, step by step, through the treatment of a patient who came to us with exactly that fear, shared with her permission. My aim is to show how predictable and controlled the process can be with digital planning.
Our patient and her one wish
A middle-aged woman with two missing teeth in her upper jaw wanted an implant, but she was very apprehensive. Her one wish was to be treated without an incision and without stitches. We first examined digitally whether that was possible in her case. Below you can follow the process with the photographs we took.
1. Where we start: the panoramic X-ray
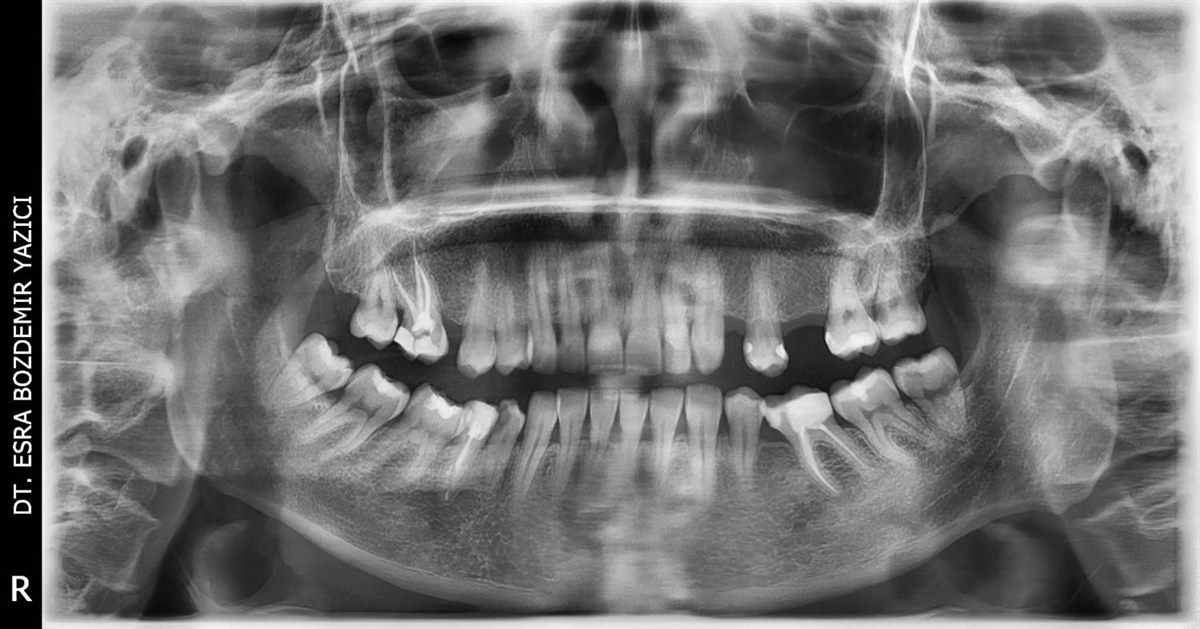
The panoramic X-ray shows the overall condition of the jaw and the area of the missing teeth. In this patient, two teeth are missing in the upper jaw. The treatment plan started from here.
2. Digital scan of the mouth
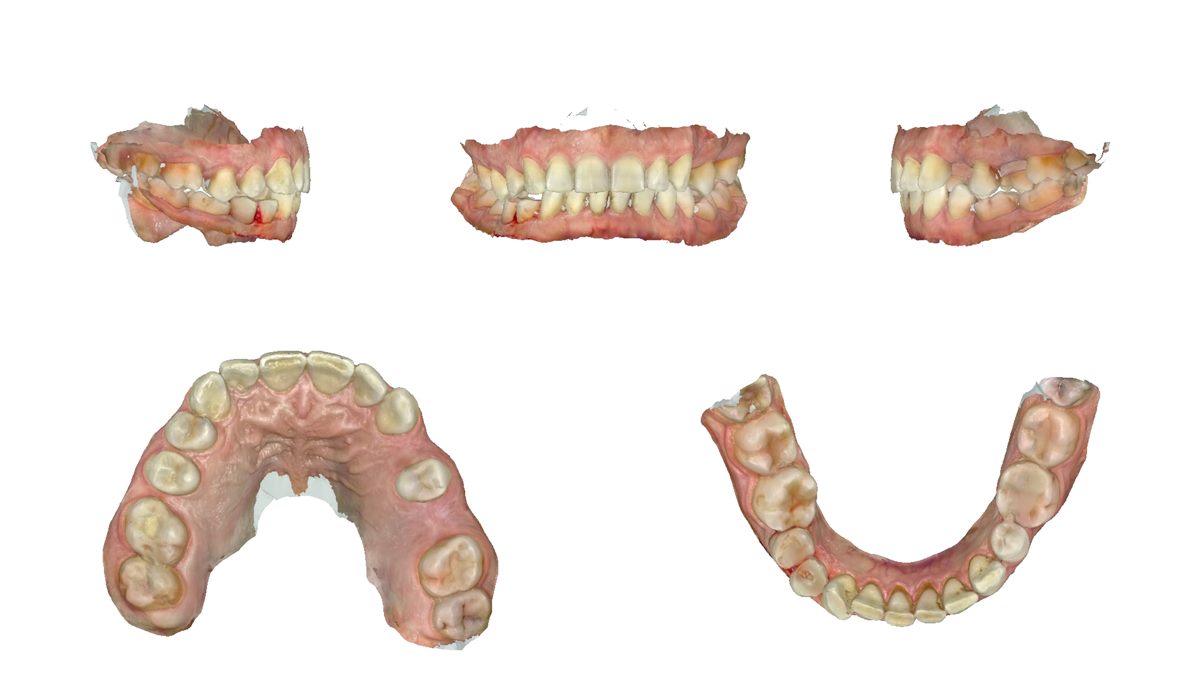
Instead of a traditional impression tray and paste, we used a digital scanner. It produced a three-dimensional, colour model of the teeth and gums, which is the foundation for all the planning that follows. It is also a more comfortable method for anyone who gags during impressions.
3. Planning in software and designing the guide
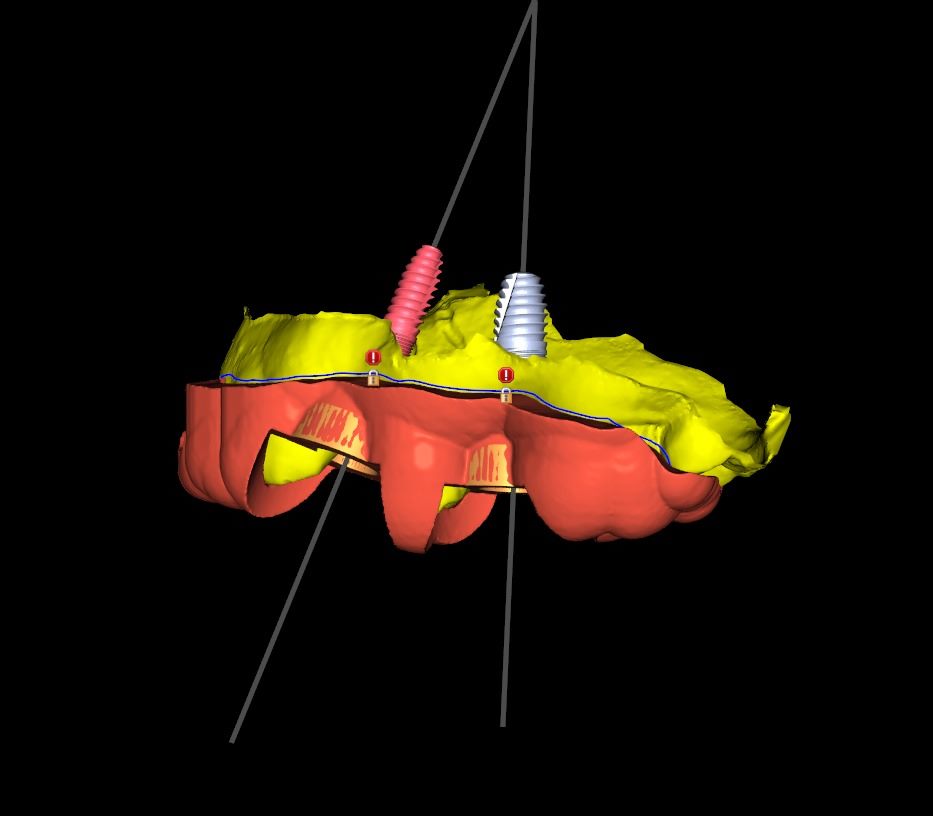
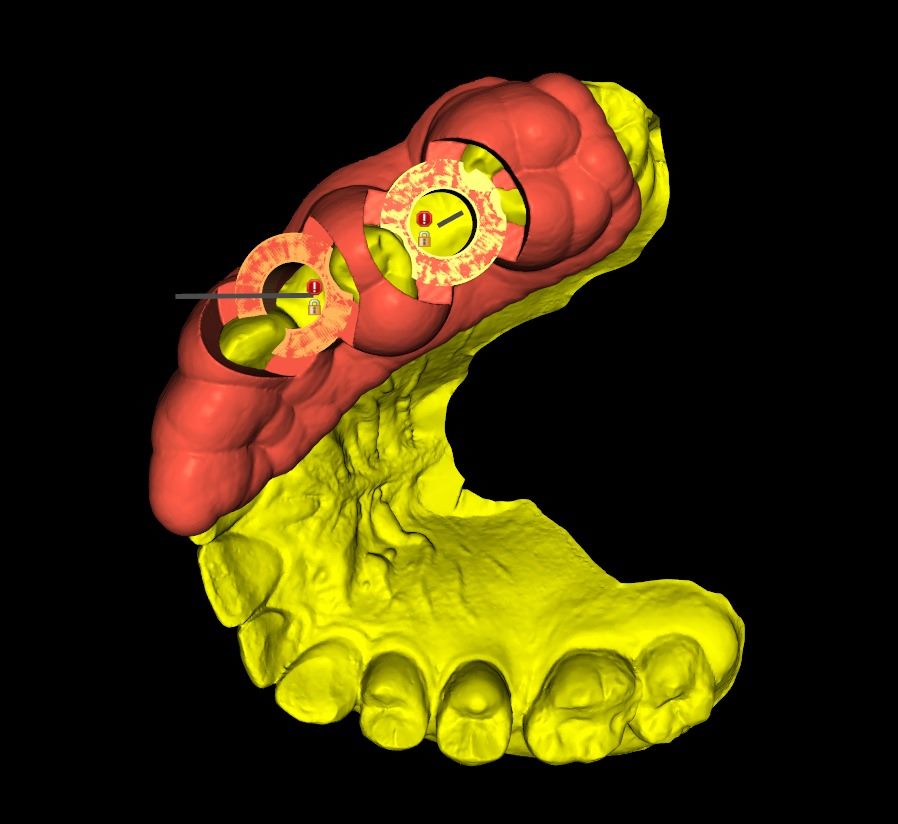
The scan and imaging data were combined on the computer. The position, angle and depth of the implants were planned on screen, and a custom surgical guide was then designed from that plan. The left image shows the direction of the implants and the right image shows how the guide sits on the teeth.
4. The custom surgical guide is manufactured
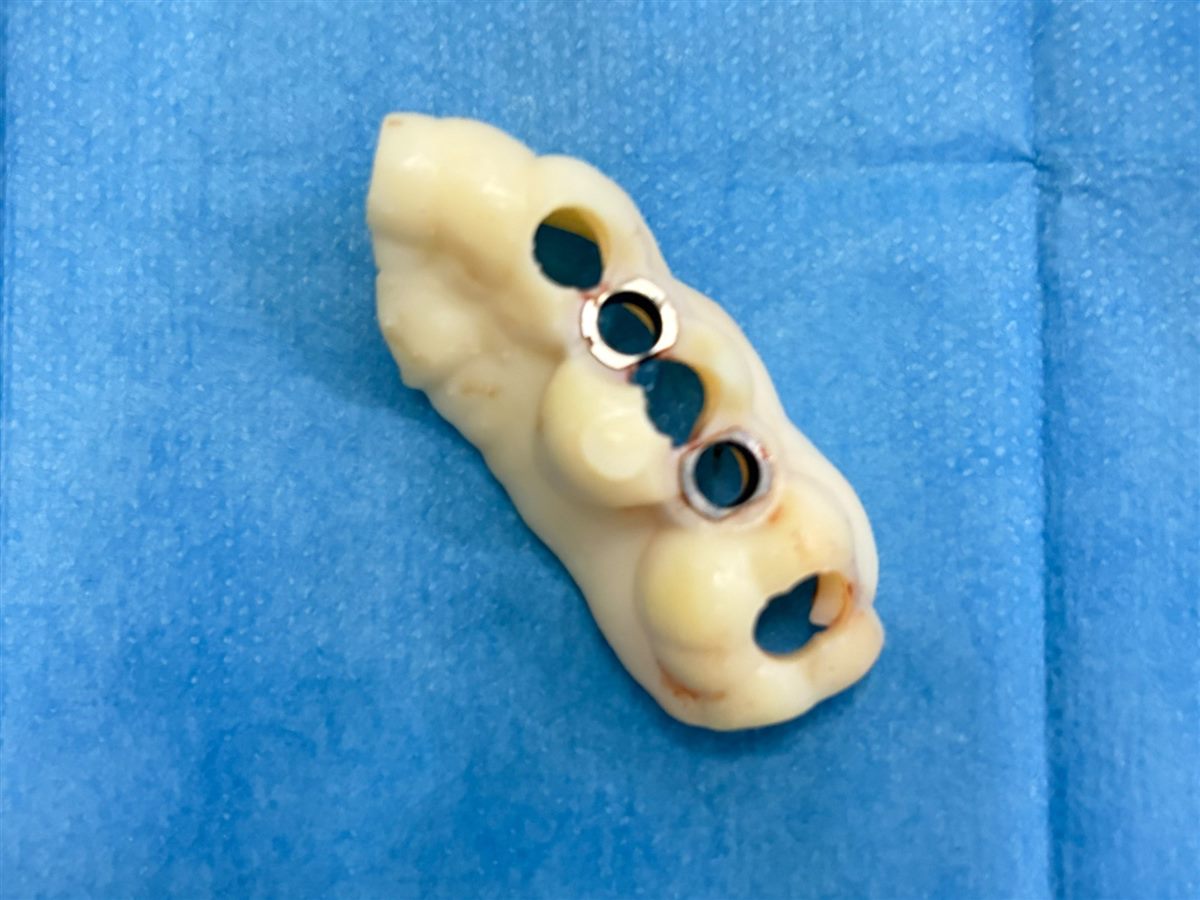
The design was produced as a guide made for this patient alone. The metal rings inside it hold the surgical drill in the planned direction. The holes show where the implant sites will be opened.
5. Preparation before surgery
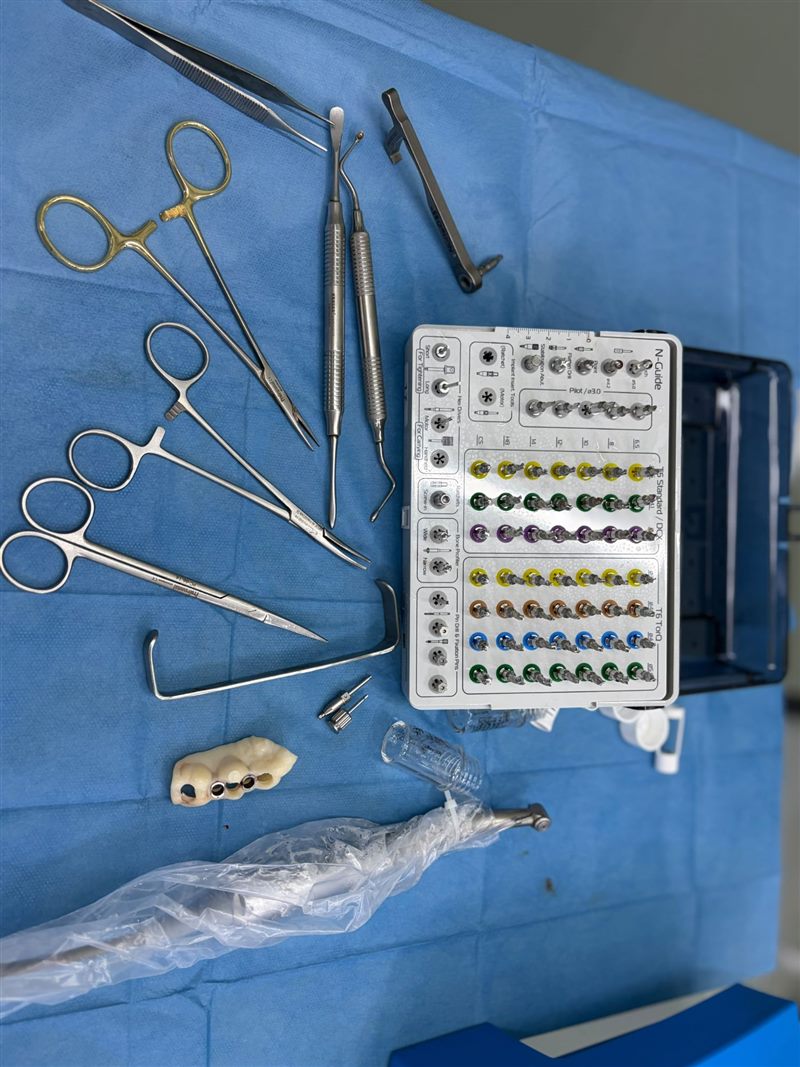
On the day of the procedure, the guided drills matched to the guide and the sterile instruments are laid out in order. It is clear at every step which instrument comes next, which keeps the procedure orderly.
6. The guide is placed in the mouth
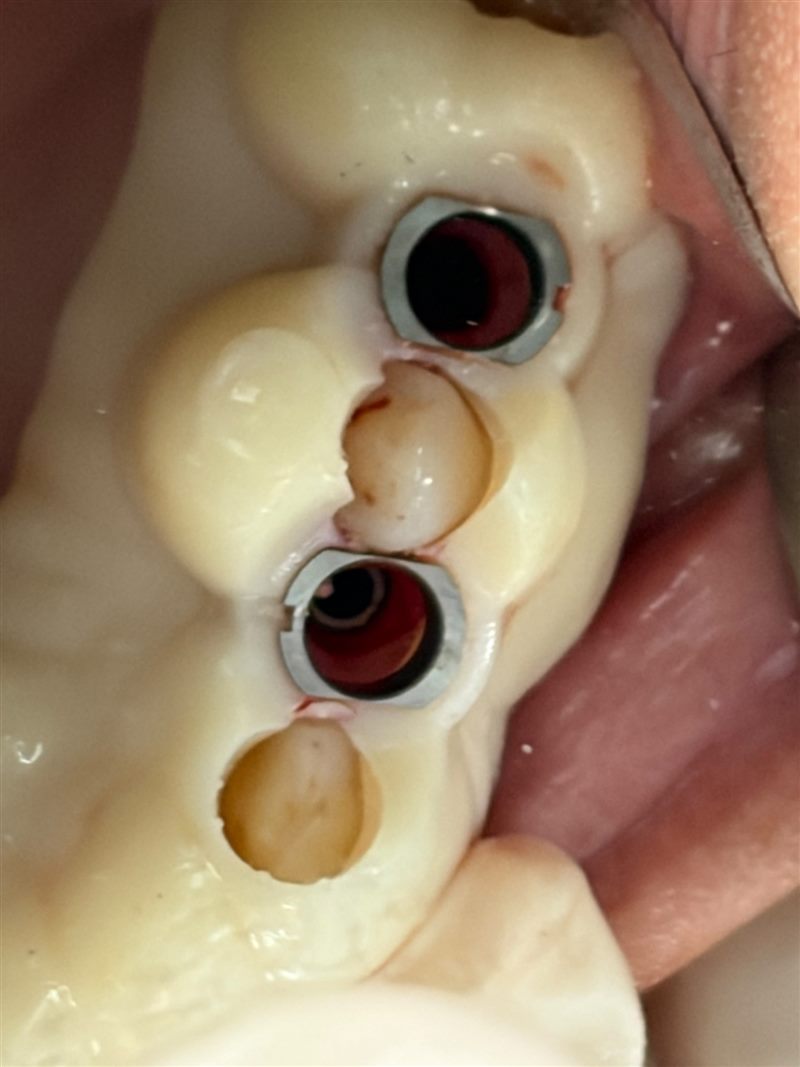
The guide is seated on the teeth. Because it is custom made, it fits in only one correct position, so the sites are opened exactly where the computer plan says.
7. The implant sites are opened through the guide
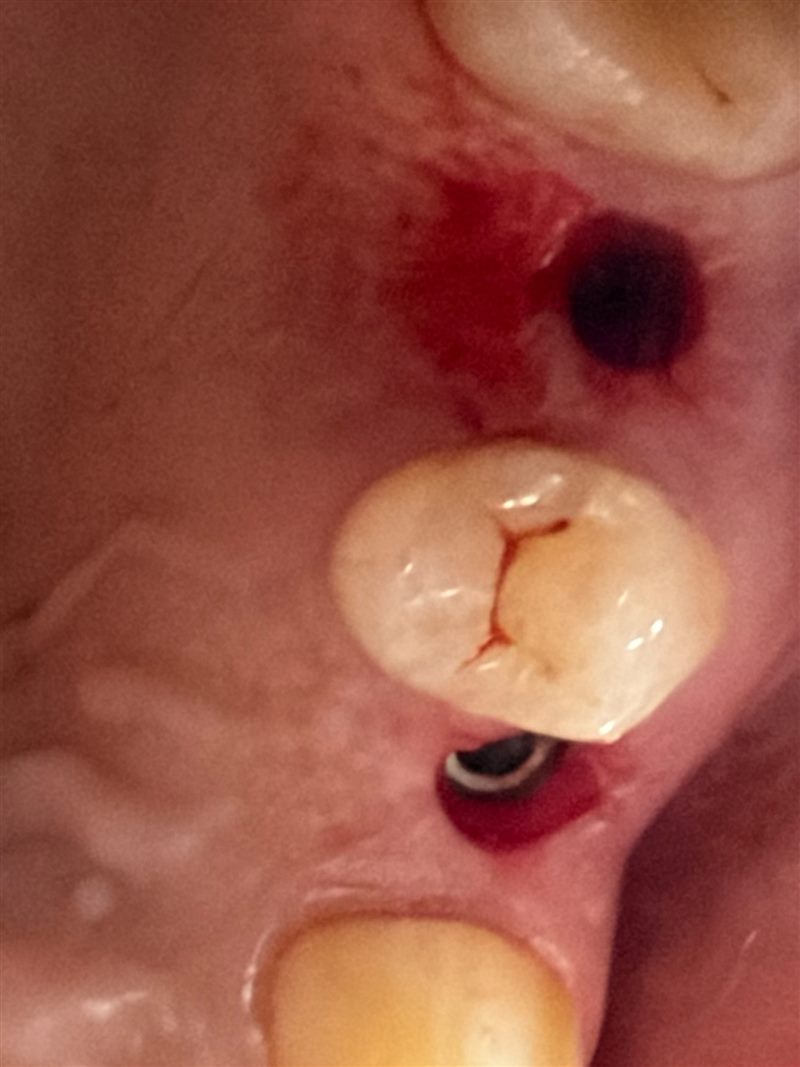
The sites were opened by working through the rings of the guide. There is no incision in the gum, only a small round opening where the implant passes.
8. The implants are placed and the guide is removed
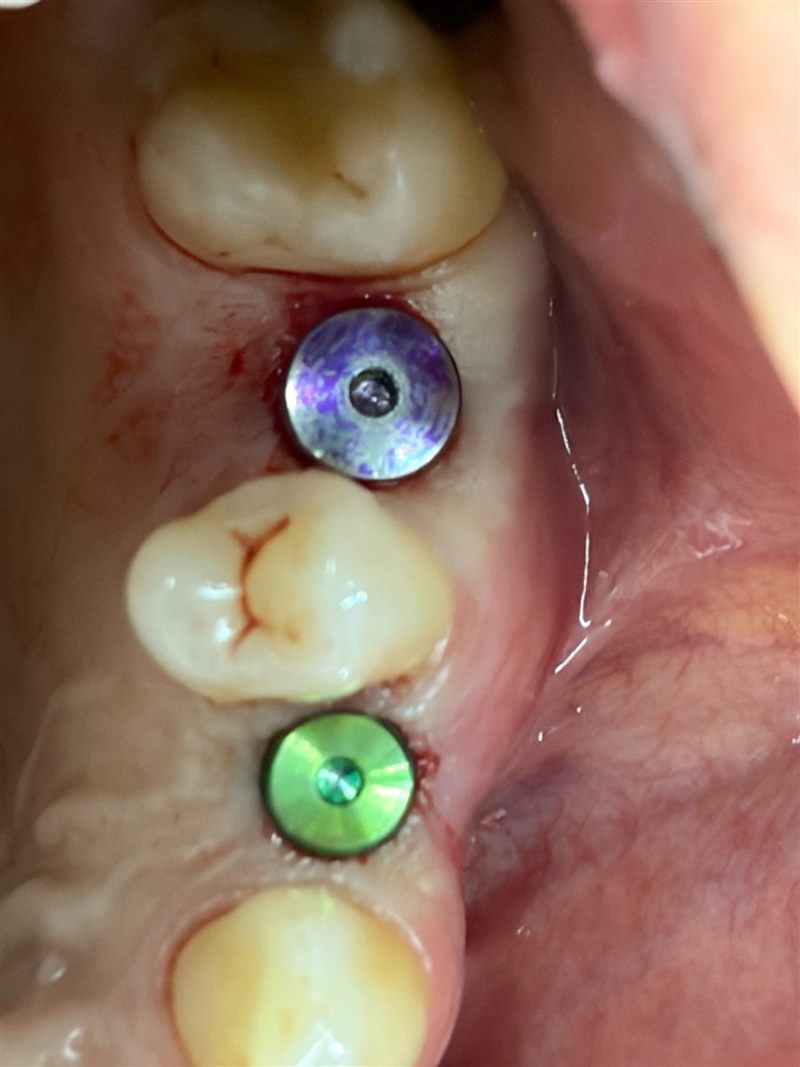
Two implants were placed and the guide was removed. There are no stitches in the gum; coloured healing caps can be seen on top of the implants.
9. The result: X-ray after treatment
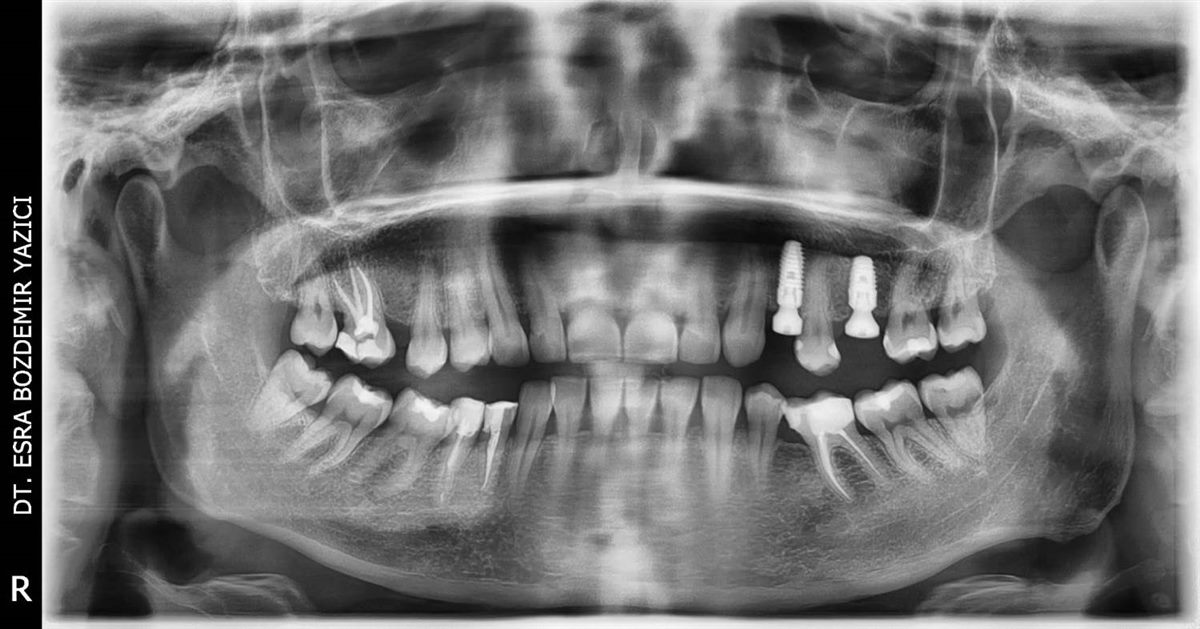
The X-ray after the procedure shows the two implants sitting in the planned area.
What did our patient experience?
Our patient reported no pain and no swelling after the procedure. That was her experience. Every patient’s bone, gum condition and healing are different, and some cases may need an incision and stitches. We decide the right method together at your check-up.
If you are afraid of implants
Tell us about your fear and your expectations. The check-up is free: let us examine your situation and assess together whether you are suitable for digital planning and a surgical guide. The photographs in this article are shared with our patient’s permission.